こんにちは。
最近愛猫にトイレの出待ちをされるようになった、品質管理部エンジニアリングチームの高橋です。
品質管理部ではアプリの自動テストを主に担当しております。
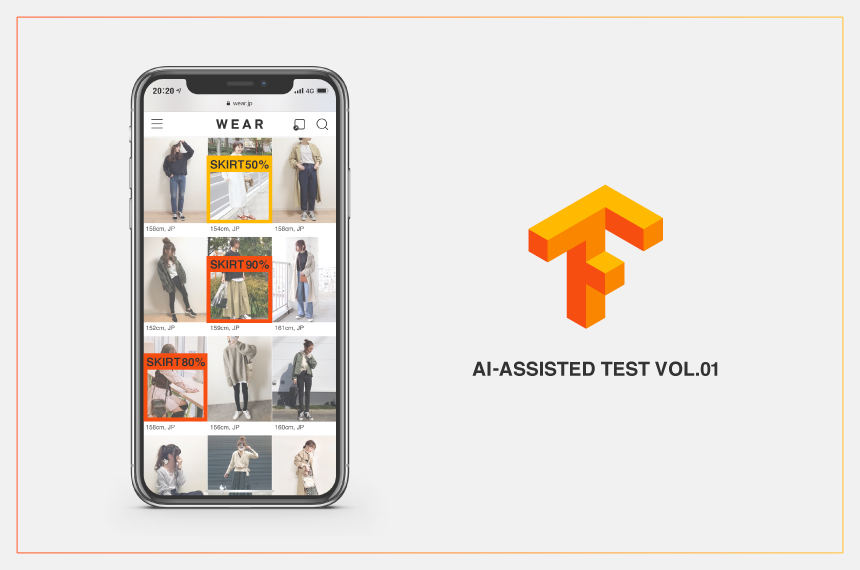
本記事はAI(Artificial Intelligence, 人工知能)を活用したテスト自動化の奮闘記となっております。 内容的にはお世辞にも先進的と言えるものではありませんが、是非あたたかい目で見て頂けると幸いです。
AI時代におけるソフトウェアテスティング
言うまでもなく、今やAIは身近な存在となっています。
ソフトウェアテスティング業界も例外ではなく、既にAIを用いたテストツールやサービスが公開されている状況です。そしてその流れは今後更に大きくなり、AIによる自動テストが当たり前の時代がやってくると予想されます。
私達もその波に乗り遅れないよう、自動テストにAIを導入することを目標に掲げ、AIの調査・検討を開始しました。
現在、品質管理部では、モバイルアプリの回帰テストを全て自動で行なっています。
iOS/Androidそれぞれのテストフレームワークを用いて、対象アプリ毎にテストスクリプトを実装し、日々メンテナンスを行なっております。
スクリプト形式の自動化の為、コーディング通りにテストが行われる単純なものではありますが、リリース前の速やかな動作確認&リグレッションテストに一役買っています。
そしてここにAIの力が加われば、伝統的なスクリプト形式のテスト自動化の枠を超えることができるのではと考えました。
画像認識AIの活用
現在のスクリプト形式自動テストの悩ましい点の1つに、「人間の認知・判断」が必要な項目は自動化を行うことができないということが挙げられます。
例えば、「キッズ」で絞り込んだ際に、「キッズの画像」が表示されていることを確認するテストです。このような人間にしか判断できない項目はテスターが手動で確認する必要がありました。しかし既にディープラーニングによる画像認識の精度は十分に人間に追いついています。よってまずはAIの得意分野である、画像認識を利用した自動テストを実装することに決定しました。
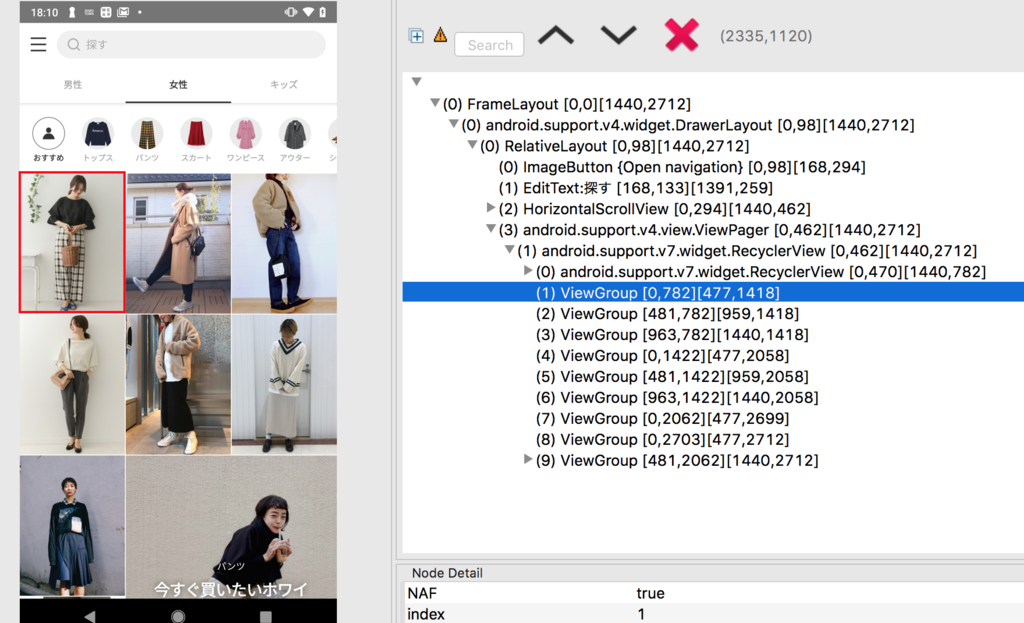
また現在のスクリプト形式のコードはアプリのUIヒエラルキーを1階層ずつ辿っていくような書き方であり、自然とコードが長くなってしまいがちです。

画像認識を用いて「この画像を探してタップする」という書き方で統一できれば、1つ1つのテストコードがよりシンプルになり、メンテナンスがしやすくなる可能性もあります。

WEAR画面上の投稿コーディネートを認識させる
AIのライブラリはTensorFlowを利用してみることにしました。
オープンソース/ライブラリが豊富/知識さえつけば自由度が高いという魅力があるらしく、公式チュートリアルも充実している為、こちらを採用することにしました。
https://www.tensorflow.org/
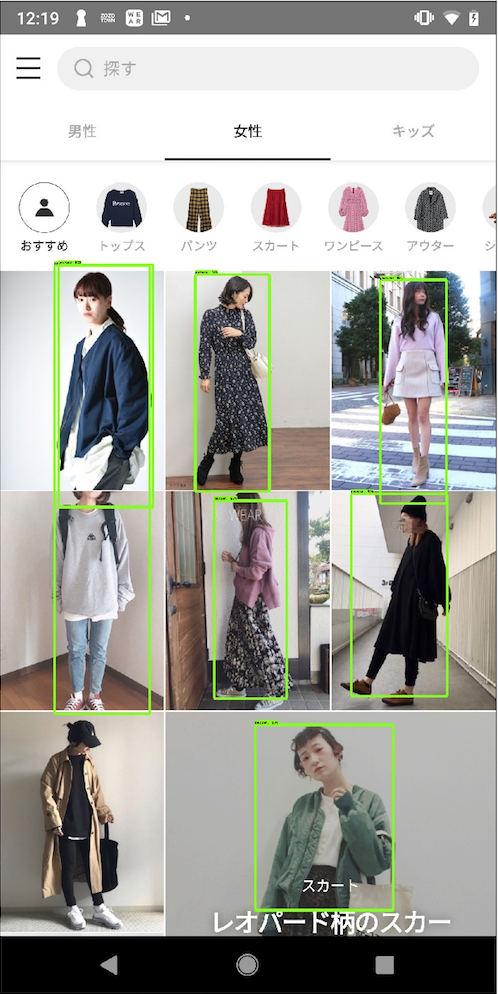
本来AIが物体認識を行うには機械学習でモデルを学習させるプロセスが必要になりますが、TensorFlowは学習済みのライブラリを提供しています。WEARアプリは"人間"が写っているコーディネート画像が表示されている為、今回は物体認識の学習済モデルを利用します。
1.TensorFlow実行環境の構築
まずTensorFlow Object Detection APIのインストールが必要ですが、ここでは詳細手順は省略します。下記の手順通りに実行すれば、問題なくインストールできると思います。
https://github.com/tensorflow/models/blob/master/research/object_detection/g3doc/installation.md
次に、学習済のTensorFlow Object Detectionモデルをダウンロードしておく必要があります。今回は下記の物体検出モデルを使用しています。
http://download.tensorflow.org/models/object_detection/ssd_inception_v2_coco_2017_11_17.tar.gz
その他の物体検出モデルは、次のURLからダウンロードできます。 https://github.com/tensorflow/models
2.モデルダウンロード、メモリへロード
ここからは、実際のテストコードとなります。
WebCameraに写っている物を認識するサンプルコードを参考に致しました。
https://github.com/tensorflow/models/tree/master/research/object_detection
# ダウンロード&保存済みのモデルとラベル・マップのパス設定
PATH_TO_CKPT = 'ssd_inception_v2_coco_2017_11_17' + '/frozen_inference_graph.pb'
PATH_TO_LABELS = os.path.join('data', 'mscoco_label_map.pbtxt')

# モデルをメモリへロード / 下記、TensorFlowチュートリアルより
detection_graph = tf.Graph()
with detection_graph.as_default():
    od_graph_def = tf.GraphDef()
    with tf.gfile.GFile(PATH_TO_CKPT, 'rb') as fid:
        serialized_graph = fid.read()
        od_graph_def.ParseFromString(serialized_graph)
        tf.import_graph_def(od_graph_def, name='')
3.ラベル、マップをロード
# 下記、TensorFlowチュートリアルより
NUM_CLASSES = 90
label_map = label_map_util.load_labelmap(PATH_TO_LABELS)
categories = label_map_util.convert_label_map_to_categories(
    label_map, max_num_classes=NUM_CLASSES, use_display_name=True)
category_index = label_map_util.create_category_index(categories)
4.テスト対象のAndroid WEARアプリを起動
# am startコマンドでMainActivity起動
subprocess.Popen("adb shell am start -n com.starttoday.android.wear/.main.MainActivity",
    shell=True,
    stdin=subprocess.PIPE,
    stdout=subprocess.PIPE).wait()
5.画像認識画面取得
# adbコマンドでscreenshot実行
TEST_IMAGE_PATH = <ホストPC保存先+ファイル名>
subprocess.Popen("adb shell screencap -p /sdcard/image.jpg", stdout=subprocess.PIPE).wait()
subprocess.Popen("adb pull /sdcard/image.jpg TEST_IMAGE_PATH", stdout=subprocess.PIPE).wait()
subprocess.Popen("adb shell rm /sdcard/image.jpg", stdout=subprocess.PIPE).wait()
6.物体検出処理開始
# 分析対象画像の配列化
image = Image.open(TEST_IMAGE_PATH)
image_np = load_image_into_numpy_array(image)
image_np_expanded = np.expand_dims(image_np, axis=0)

# 1つの画像に対する物体検出
# run_inference_for_single_image()は、Tensorflow公式Tutorial提供関数
# 画像より検知した物体データがoutput_dictに保存
output_dict = run_inference_for_single_image(image_np, detection_graph)

# run_inference_for_single_imageの処理内容は下記の通りである
def run_inference_for_single_image(image, graph):
  with graph.as_default():
    with tf.Session() as sess:
      # Get handles to input and output tensors
      ops = tf.get_default_graph().get_operations()
      all_tensor_names = {output.name for op in ops for output in op.outputs}
      tensor_dict = {}
      for key in [
          'num_detections', 'detection_boxes', 'detection_scores',
          'detection_classes', 'detection_masks'
      ]:
        tensor_name = key + ':0'
        if tensor_name in all_tensor_names:
          tensor_dict[key] = tf.get_default_graph().get_tensor_by_name(
              tensor_name)
      if 'detection_masks' in tensor_dict:
        # The following processing is only for single image
        detection_boxes = tf.squeeze(tensor_dict['detection_boxes'], [0])
        detection_masks = tf.squeeze(tensor_dict['detection_masks'], [0])
        # Reframe is required to translate mask from box coordinates to image coordinates and fit the image size.
        real_num_detection = tf.cast(tensor_dict['num_detections'][0], tf.int32)
        detection_boxes = tf.slice(detection_boxes, [0, 0], [real_num_detection, -1])
        detection_masks = tf.slice(detection_masks, [0, 0, 0], [real_num_detection, -1, -1])
        detection_masks_reframed = utils_ops.reframe_box_masks_to_image_masks(
            detection_masks, detection_boxes, image.shape[0], image.shape[1])
        detection_masks_reframed = tf.cast(
            tf.greater(detection_masks_reframed, 0.5), tf.uint8)
        # Follow the convention by adding back the batch dimension
        tensor_dict['detection_masks'] = tf.expand_dims(
            detection_masks_reframed, 0)
      image_tensor = tf.get_default_graph().get_tensor_by_name('image_tensor:0')

      # Run inference
      output_dict = sess.run(tensor_dict,
                             feed_dict={image_tensor: np.expand_dims(image, 0)})

      # all outputs are float32 numpy arrays, so convert types as appropriate
      output_dict['num_detections'] = int(output_dict['num_detections'][0])
      output_dict['detection_classes'] = output_dict[
          'detection_classes'][0].astype(np.uint8)
      output_dict['detection_boxes'] = output_dict['detection_boxes'][0]
      output_dict['detection_scores'] = output_dict['detection_scores'][0]
      if 'detection_masks' in output_dict:
        output_dict['detection_masks'] = output_dict['detection_masks'][0]
        return output_dict
7.物体検出結果の解釈
output_dictの出力結果の項目は次のようになっており、検出物体の詳細情報が保存されています。
- class 認識結果
- prediction 検出精度
- boundingbox 検出された座標位置
8.検出結果の判定と画面操作コード実行
# output_dictに保存している検出結果の判定処理を開始
for i in range(len(output_dict['detection_boxes'])):
    # class_name = 検出物体名(クラス名、例:person, car, bag, cellphone,,,)
    # accuracy = 検出物体の精度(例:"person"クラスである確率がXX%)
    class_name = category_index[output_dict['detection_classes'][i]]['name']
    accuracy = output_dict['detection_scores'][i]

    # 物体検出の精度が70%未満であれば何もしない
    if accuracy < 0.7:
       break

    # 検出物体クラスが'人(person)'の場合のみ処理実行
    if class_name != 'person':
       break
    else:
        # 分析画像の横縦長さ:adbコマンドで検出物体のxy座標計算時に利用
        width = image_np.shape[1]  # Number of columns
        height = image_np.shape[0]  # number of rows

        # 該当投稿の座標を指定しタップ実行
        # コマンドの例:adb shell input touchscreen tap x座標 y座標
        print ("詳細画面へ移動(クリック)")
        xPosition = int(width * output_dict['detection_boxes'][i][1])+((int(width * output_dict['detection_boxes'][i][3])-int(width * output_dict['detection_boxes'][i][1]))/2)
        yPosition = int(height * output_dict['detection_boxes'][i][0])+((int(height * output_dict['detection_boxes'][i][2])-int(height * output_dict['detection_boxes'][i][0]))/2)

        subprocess.Popen(['adb', 'shell', 'input', 'touchscreen', 'tap',
                    str(xPosition),
                    str(yPosition)],
                    stdout=subprocess.PIPE).wait()

        # 投稿をクリック後、正常に画面遷移が行われ、コーデ詳細画面に移動しているかの確認
        # WEARアプリのコーディネート詳細画面Activity名:DetailSnapActivity
        out = check_output(['adb','shell','dumpsys','activity','|','grep','mResumedActivity'])
        if b'DetailSnapActivity' in out:
            print ("OK! 詳細画面への正常遷移")
            print ("前の画面へ移動(キーイベントで移動、KEYCODE_BACK=4)")
            subprocess.Popen("adb shell input keyevent 4", shell=True, stdin=subprocess.PIPE, stdout=subprocess.PIPE).wait()
            time.sleep(2)
        else:
            print ("NG! 詳細画面への遷移失敗")
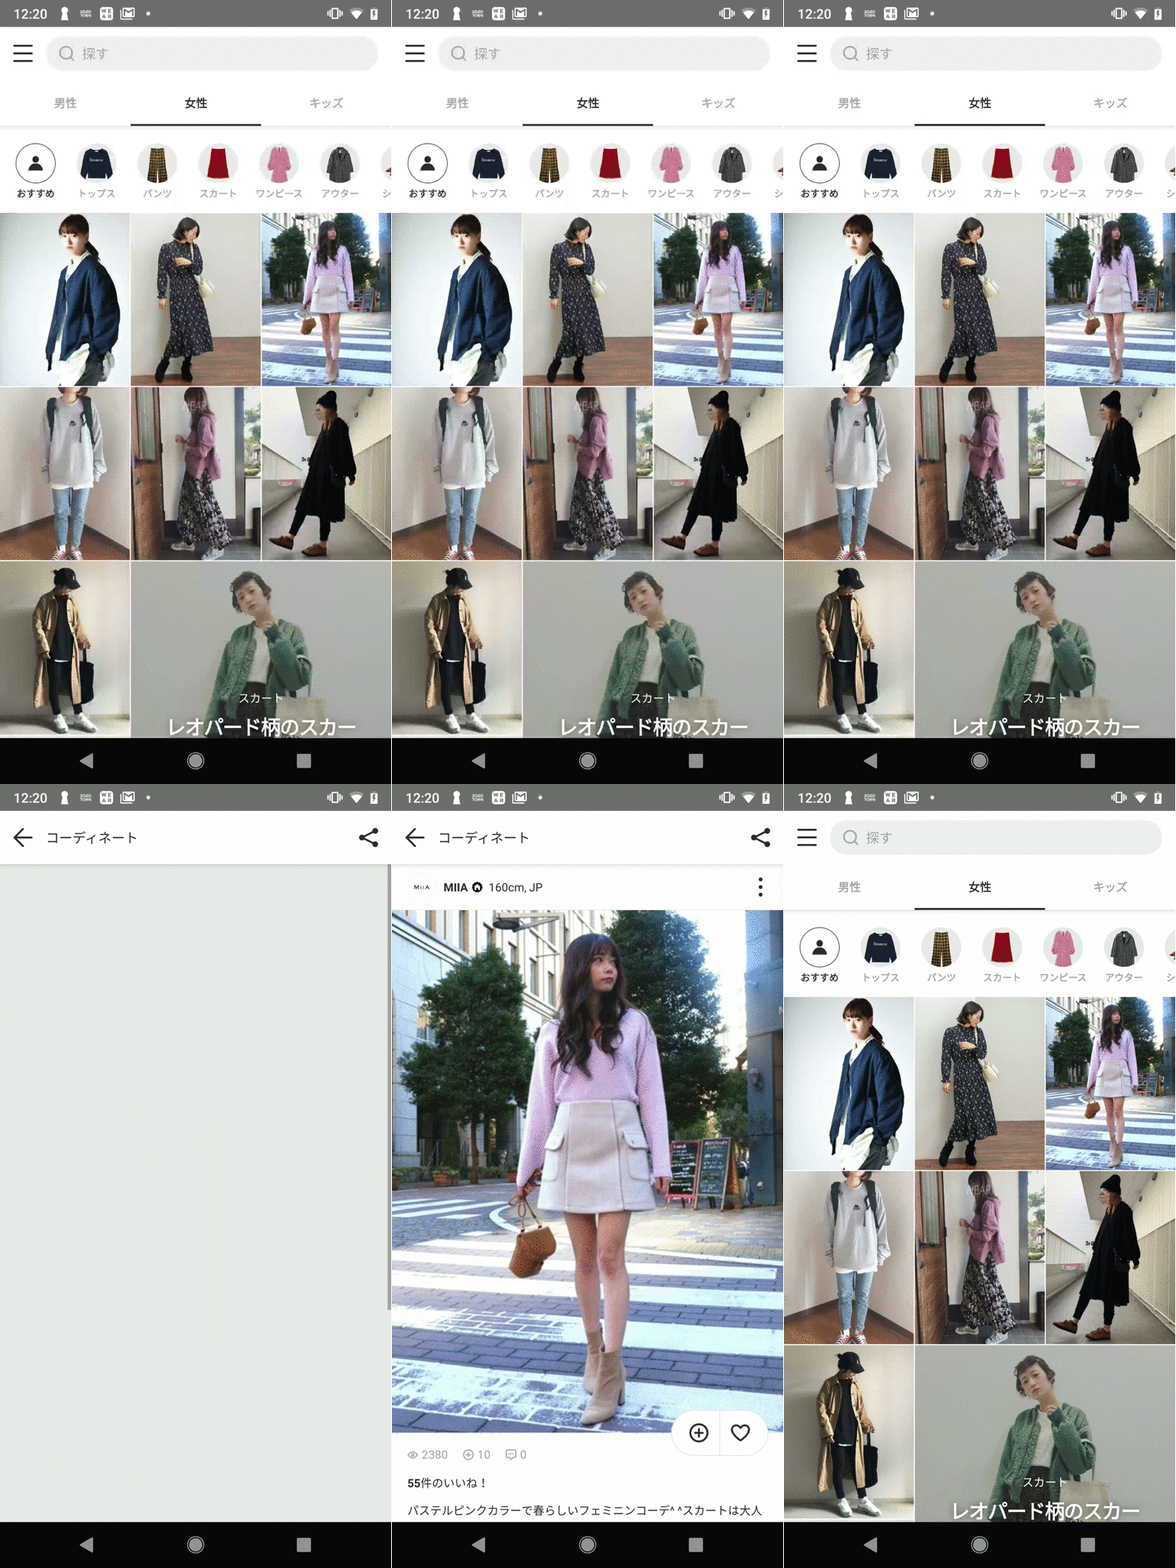
実行すると…しっかりコーディネート画像をタップしてくれました!
 |
 |
今後の展望
今回は学習済モデルを使用した為、予想よりも短い時間で実装までたどり着くことができました(もちろん四苦八苦しましたが)。
このチャレンジによって少しずつTestingにおける画像認識AIの活用性が見えてきた気がします。
今後は以下のような人依存のテストパターンもAIを利用して行ってみたいと考えています。
・投稿コーディネートが性別と一致しているか
・投稿コーディネートが本当にファッション関連投稿なのか
・投稿コーディネートが該当タグ(帽子、ブランド名等)に一致しているか
また将来的には、弊社アプリ向けにモデルをトレーニングしてテストを実行してみたいと思います。
以上が、AI-assistedの第一歩としてTensorFlowの学習済モデルを使用してみた体験談です。 AI門外漢/文系出身の自分としては、機械学習に関する知識が全く足りていないことを痛感しました。理想が実現するのは近い将来ではなさそうですが、日々精進していきたいと思います。
ZOZOテクノロジーズでは、一緒にサービスを作り上げてくれる方を募集中です。
ご興味のある方は、以下のリンクからぜひご応募ください。